Niffler, that Thief!
The things you can do when the build takes forever! I added some jingle to the niffler build, here is the video of it
and pics are below


The things you can do when the build takes forever! I added some jingle to the niffler build, here is the video of it
and pics are below
So, I been busy printing away, the wife can attest to that, pretty much keeping the machine busy as hell, prolly only 2 hours of downtime a day. here is the machine by the way, a Creality CR-10:


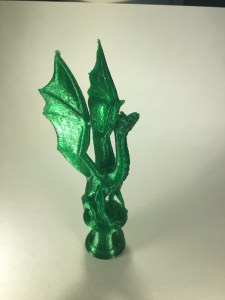
Although I’ve been busy printing upgrades mostly, I have printed things like this:


Got a few more upgrades working on, but after that, I have to learn myself some Fusion 360. I designed one thing, a place to hold my glucose testing stuff. I was a bit off, and made some errors, but overall it works. Poor laser sitting in the garage not getting much love lately tho.
Haven’t posted pics of the new printer yet, still tweaking it a bit, but it is working. Here are some of the test prints I did first tho:
Very first print, supplied with the machine:


it’s a tiny vase!
Next up, benchy:


last is a test cube, I printed it fast, so it has some ringing in the x/y planes, but I knew it would happen, didn’t care :).


So did a couple of quick projects, first being coasters, did them with cork backing, and made a nice little holder. Go Hogwarts! Wife wants a couple more coats of varnish to have them last.


Next up was a light up acrylic thingy, I need to possibly do a change to the graphic to vector art, but it worked well as a raster scan, although the colored ones seem to suck up too much light, causing a light decrease as it reaches the top.

Pretty happy with the materials I got, got like 20′ of leds cheap, some various thickness of colored plastic, sadly mostly black and white, but one pink sheet (it’s what base is made of), and a reused wall wart.
So the original head on my 50W laser was a design nightmare, forgot to take a pic of original, but here is one i found below, I only wished mine looked that open, as there is a large plate in back of it, the original knurled tips where greatly marked up from the factory also.
The problems with it where that the grub screws bite into a screw thread, and you carefully adjust the heights, lock it down, and you are now screwed, as the grub wants to bite into a channel of the screw, throwing it off. And thats if you could get the third grub screw locked down in the first place as the back one left like less than an inch of clearance to get to it.
So, was thinking on it, and came up with this re-arrangement:
I only had to add 3 4mm screw holes in a reverse triangle of the original hole set, but was careful to put the single low one centered in the thinner area of the block so it still hit the below tube where there was meat. The other 2 where much easier, but I equally spaced them for an even triangle. Added new 5mm bolts and reused the springs, then added 4mm bolts with lock nuts. This works much better as there was enough slop in the block to accomodate movement around the new screw springs.
Unseen is the modified the screw to have a point also, as I originally tried it unmodded, and adjustment with a large flat area was not going to work.
After all was said and done, here is my final burn result, a fairly round centered laser mark.
Upshot of this is you can remove the block to clean the mirror and inspect the tube, and put it right back on and get the same adjustment settings by just tightening up the spring screws, same as the other mirror mounts.
So, only had my laser for about 3 weeks, and have it getting near finished setup in shop, ie just have to finish the outside ventilation, but took some time with just a hose out the garage to do this:


Surprised that the dimensions came out all just right, ie no real kerf management. Fits just right with .1mm gap for nesting also. Guess I can make it for may gamer family now as gifts 🙂
So, aside from getting a weird message on my laser, “no enough extend space”, which I took to mean that I was running out of system memory, and so I set about for several worthless hours to try and fix the image. Turns out, very badly crafted Chinese to English, all it wanted me to do was start farther away from the origin point so it had room to move about 3 inches in and down.


So first test was at just swag of 100mm/s @ 25% power on a scrap piece of maple. I printed 2 images, and was pretty happy with this pair of items, took me a while to get something I liked for a project upcoming, and was pretty pleased at the depth and detail.
Next up, i did a simple array of speed/power settings, think i was pretty jazzed about the last, as it is 2.4x faster than the initial, and gives similar results.


So, seems universal concern that a milliamp meter is required, and a temperature meter for the water bath. So I added both, and thus first project, a small acrylic box to hold them:


still gotta glue it together and permanently mount it, but it is working, so I got that going for me.
So, made a proper height table for the laser to get the bed to a comfortable height. Still had room for the low table (I think only 24″ high) to have a home for the water tank and air assist.

Had time to do a small first project after some initial current draw testing to home in on what works with 5.6mil and 2 mil acrylic.

